
Google Workspace Setup Guide
A step-by-step walkthrough to get your business email and domain configured. Setting up Google Workspace from scratch is a highly structured process. To ensure you don’t lose any emails, you will set up your accounts and migrate your existing emails before officially pointing your live custom domain's mail traffic to Google.
Create Your Google Workspace Account
Since you do not currently have a Google account, you will start completely fresh.
- Go to workspace.google.com and click Get Started.
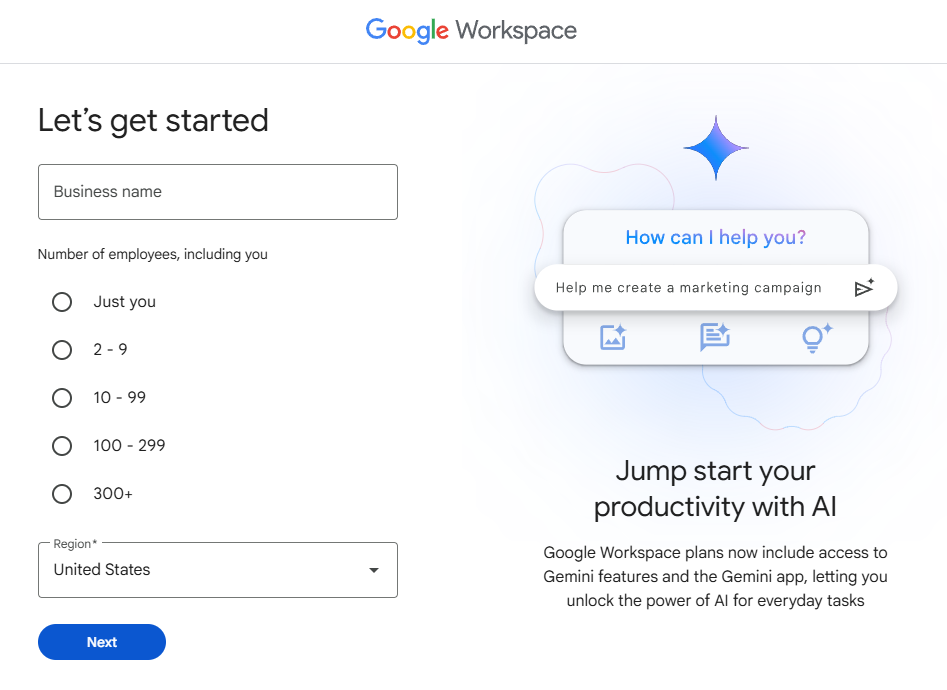
- Enter Business Details: Input your business name, number of employees, and region.
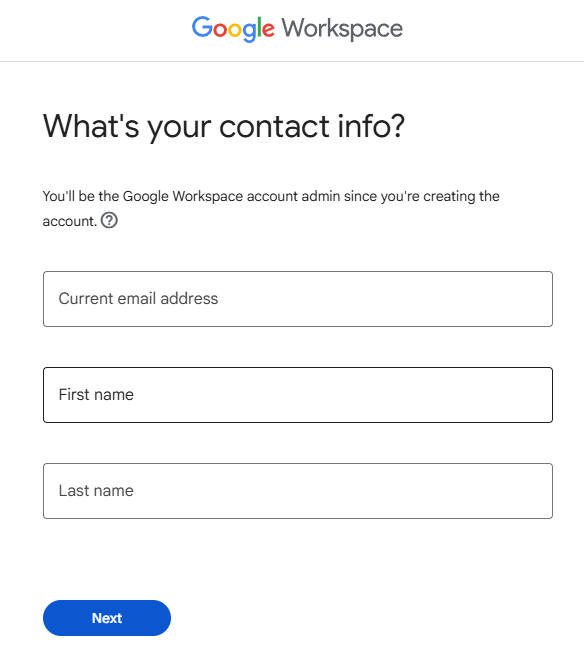
- Contact Information: Enter your current personal email address (like a personal Yahoo, iCloud, or Outlook address) to receive setup details.
- Domain Prompt: When asked "Does your business have a domain?", select "Yes, I have one that I can use". Enter your pre-existing custom domain (e.g., `yourdomain.com`).
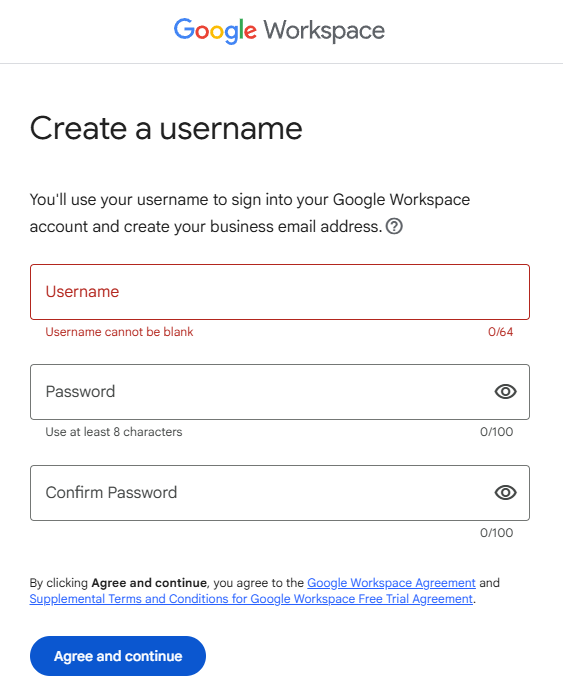
- Create Admin Username: Create your first user account. This will serve as your Super Administrator account (e.g., `admin@yourdomain.com`). Choose a secure password.
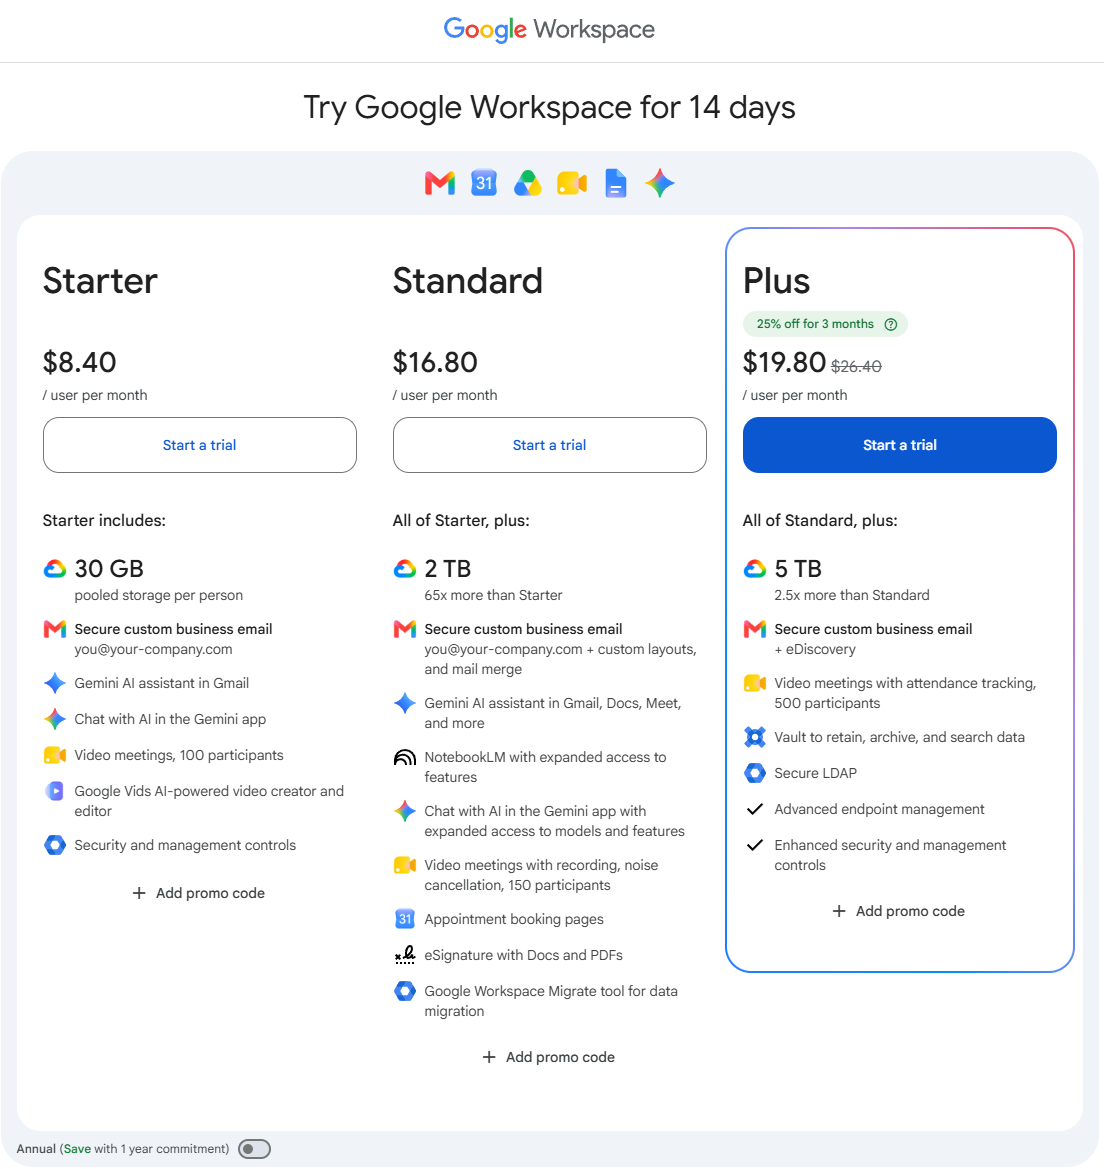
- Billing Setup: Select your subscription plan - click Compare Plans to view all available subscription plans (e.g., Business Starter, Standard, or Plus) and complete the payment/billing configuration.
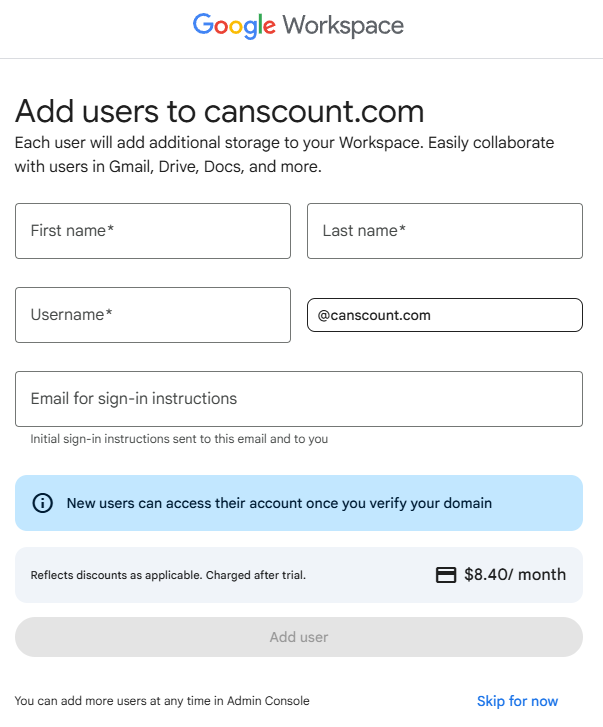
- Skip adding additional email accounts at this time. Click Skip for now
Add Your Custom Domain
To use professional email addresses (like name@yourcompany.com), you need to connect your custom domain to Google Workspace.
- After finishing the setup wizard, sign in to the Google Admin Console using your newly created admin credentials.
- The setup wizard will prompt you to Verify your domain. Click Protect (or Verify).

- If there is no pompt, navigate to Account >> Domains >> Manage Domain
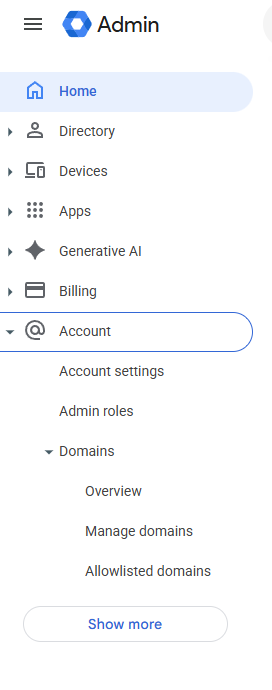
- Click Verify Domain next to your custom domain name.
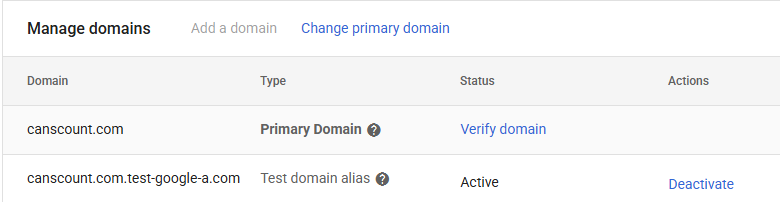
- If there is no pompt, navigate to Account >> Domains >> Manage Domain
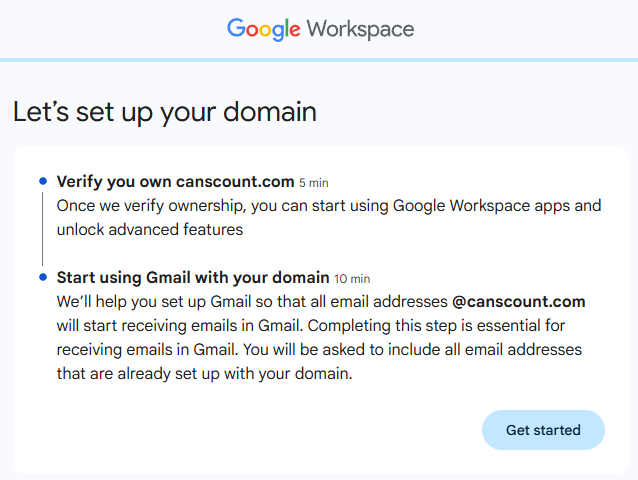
- Let's setup your domain. Click Get started.
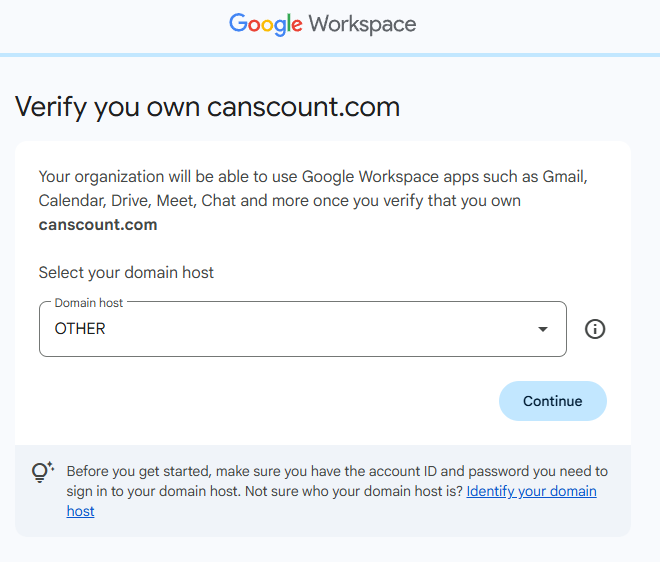
- Select Other from the Domain host drop down.
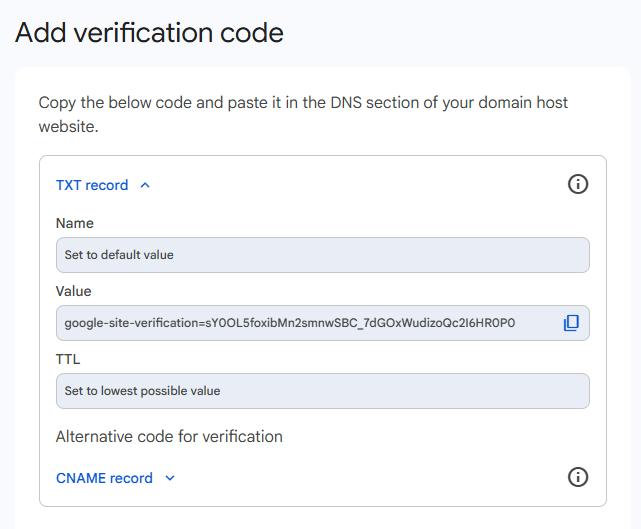
- Google will generate a unique verification code. Copy the TXT record value provided (it usually looks like `google-site-verification=...`).
- If ISADEX manages your DNS,
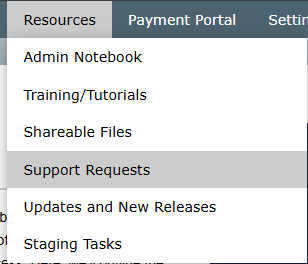
- Log into your websites administrative area. Navigate to Resources >> Support Resquests.
- Click the green New Request button.
- Fill out the form and paste the Value that Google provided in the Support Request Description.
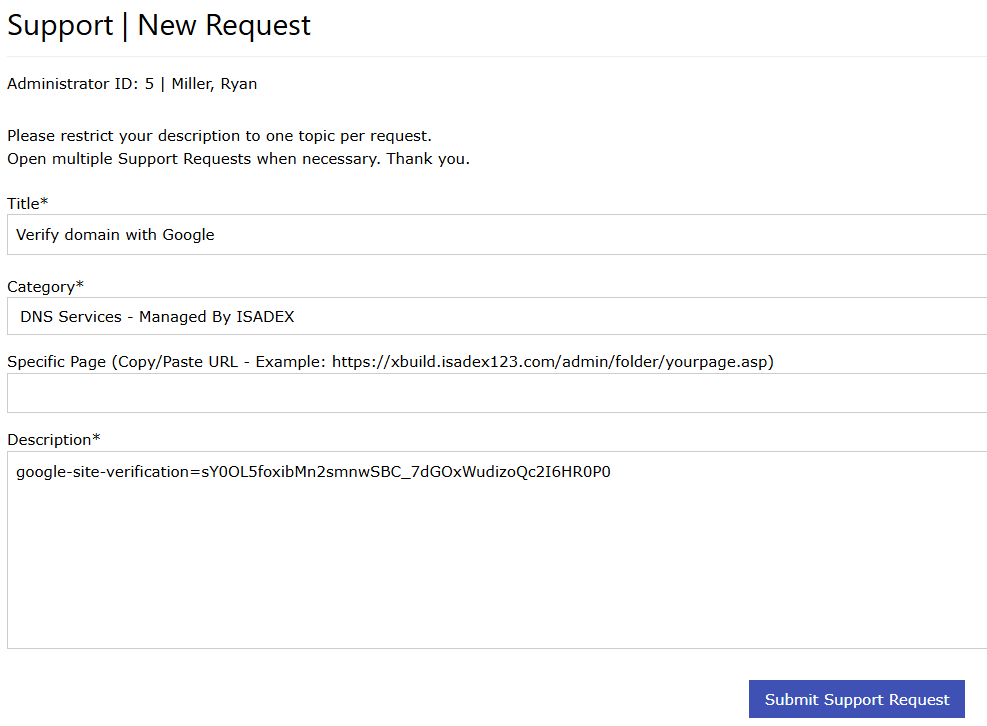
- Submit the Support Request.
- Domains can only be verified after the changes to DNS have been made. ISADEX will email you as soon as those changes have been completed.
- Once you received confirmation from ISADEX that the DNS record has been added skip to step 6.
- Log into your websites administrative area. Navigate to Resources >> Support Resquests.
- If you control your own DNS
- Log in to your domain registrar (e.g., GoDaddy, Namecheap) and add this TXT record to your DNS settings.
- If ISADEX manages your DNS,
- Return to your Google Admin Console.
- Check "Come back here and confirm once you have updated the code on your domain host" at the bottom of the screen theck click Confirm.

- Note: DNS changes can sometimes take anywhere from 10 minutes to 24 hours to propagate across the internet.
- Check "Come back here and confirm once you have updated the code on your domain host" at the bottom of the screen theck click Confirm.
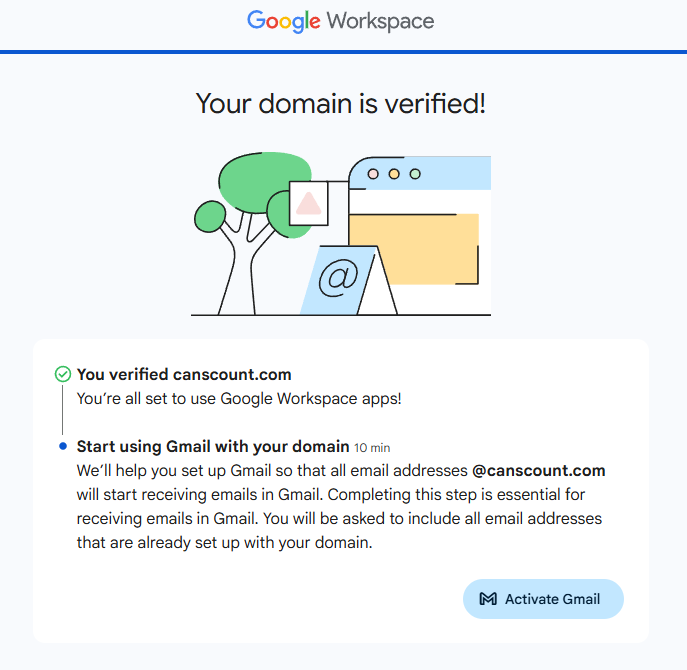
- Verification Complete.
Create User Accounts for each mailbox
- In the Google Admin Console, go to Menu >> Directory >> Users.
- Click on Add new user.
- Enter their First Name, Last Name, and desired primary email address (e.g., `alex@yourdomain.com`).
- Copy the temporary password generated for them.
- Repeat this process for all email account that you want to create.
Transfer Your Existing Email Optional
You can transfer your historical emails directly into your new Google inbox.
To ensure no history is lost, you can migrate your existing IMAP emails into the newly created Google Workspace mailboxes. Keeping your domain pointing to ISADEX during this step prevents new emails from interrupting the migration.
Make sure you have the passwords for all the ISADEX hosted email accounts you want to migrate.
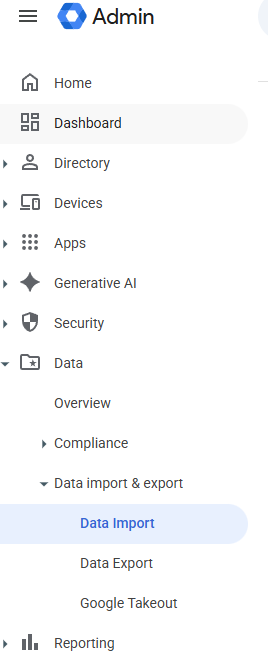
- In your Google Admin Console, go to Menu > Data > Data import & export > Data import.
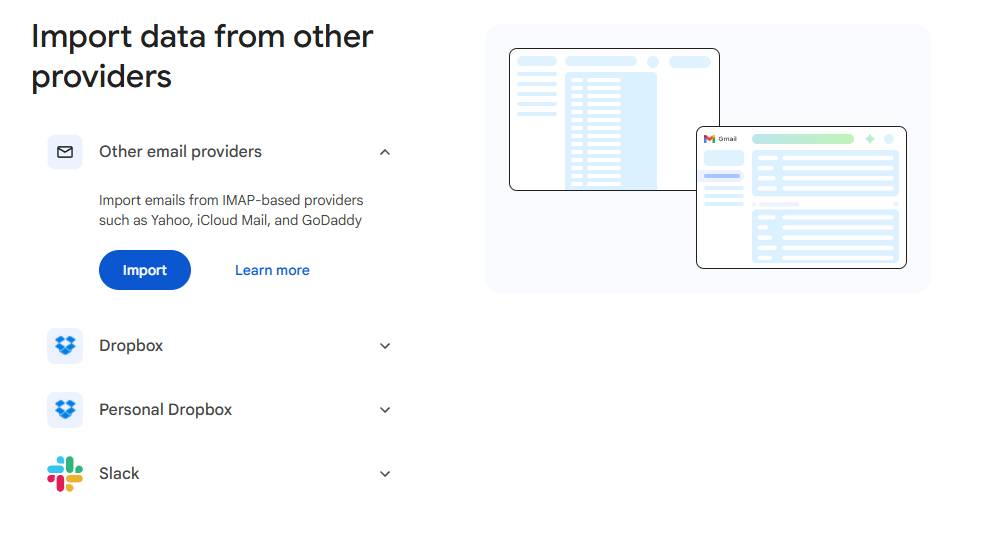
- Scroll down to Import data from other providers Click Import.
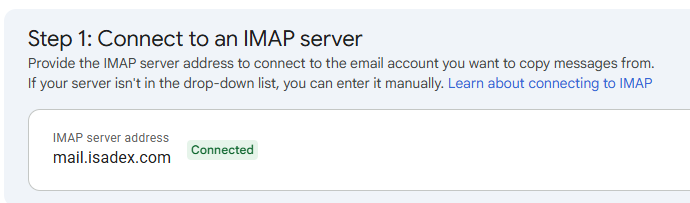
- Connect to ISADEX IMAP server. Set the IMAP server to mail.isadex.com
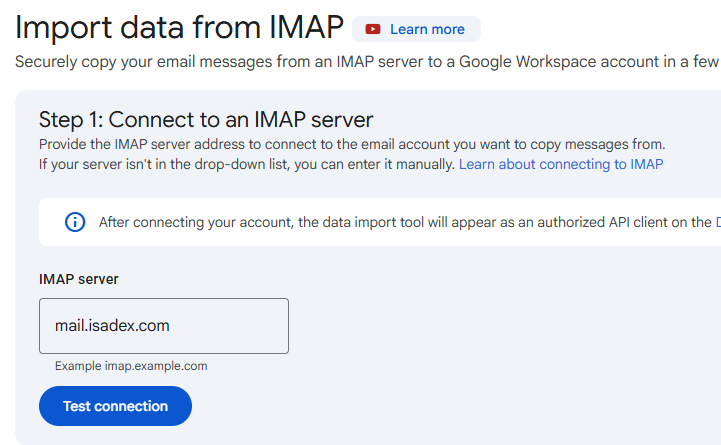
- Click Test connection to verify Google can talk to ISADEX's email server.
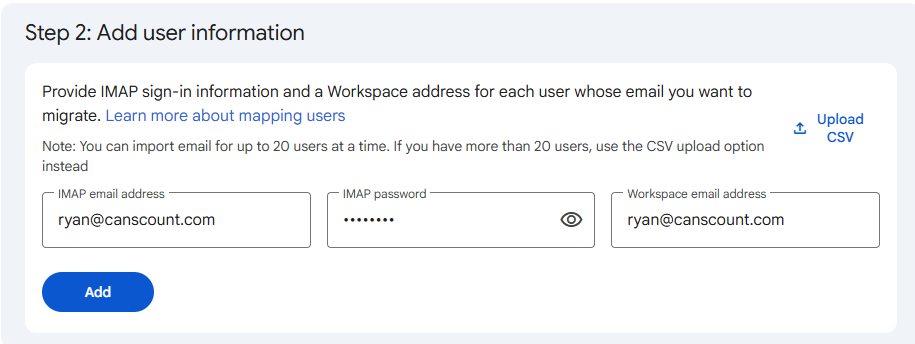
- For each of the ISADEX email accounts and passwords map them to the newly created workspace email addresses then click Add.
*The IMAP password is the current password used to sign into your ISADEX hosted email accounts, NOT the new passwords you just setup in Google Workspace.
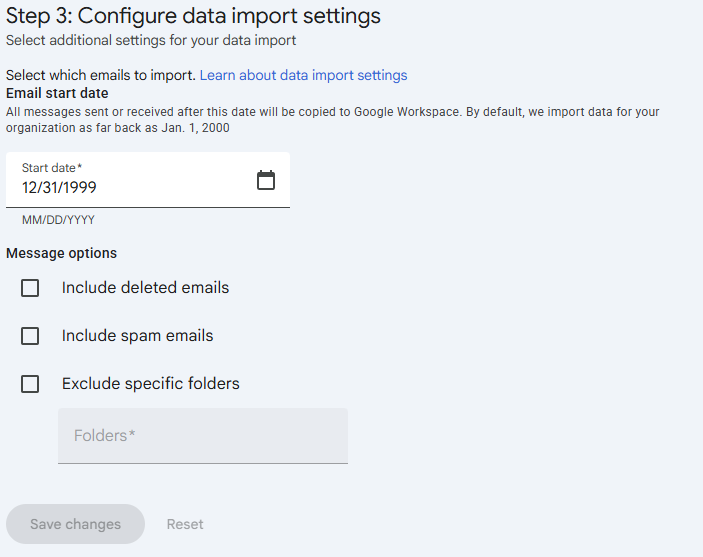
- Configure data import settings (Optional). You can choose if you wish to not migrate over certain folders such as spam and deleted messages.
- Once mapped, click Start import. You can monitor the progress bar inside the Admin Console.
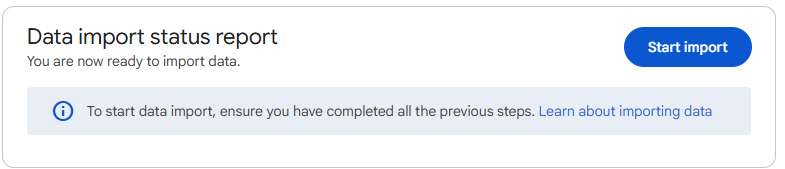
Depending on mailbox sizes, this can take anywhere from a few minutes to several hours.
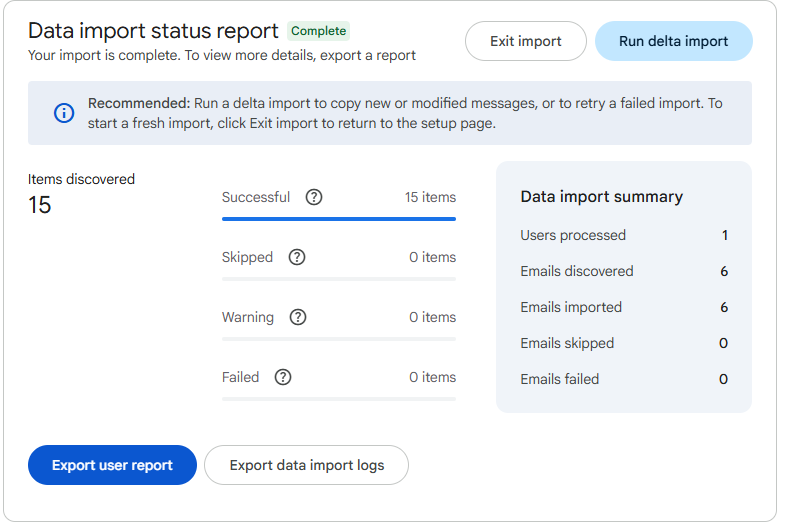
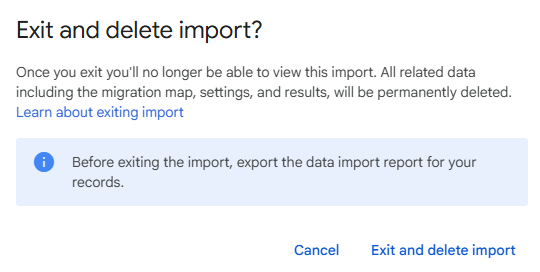
- After a Completed import click Exit import. Click Exit and delete import
Point DNS Records to Google (Go Live)
- In your Google Admin Console, go to Menu > Account> Domains > Manage domains.
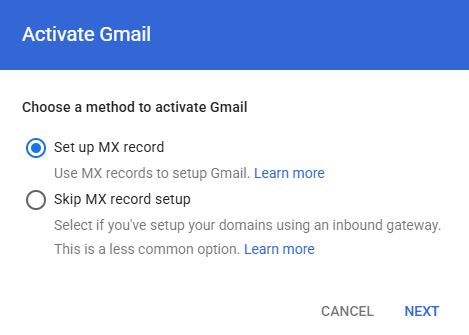
- Click Activate Gmail next to your custom domain.

- Select Set up MX record and click Next.
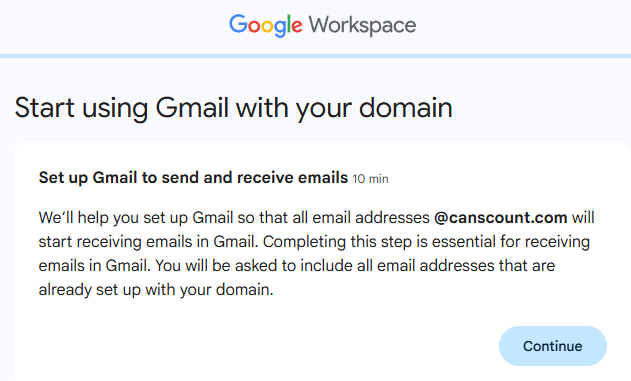
- Start Using Gmail with your domain. Click Continue.
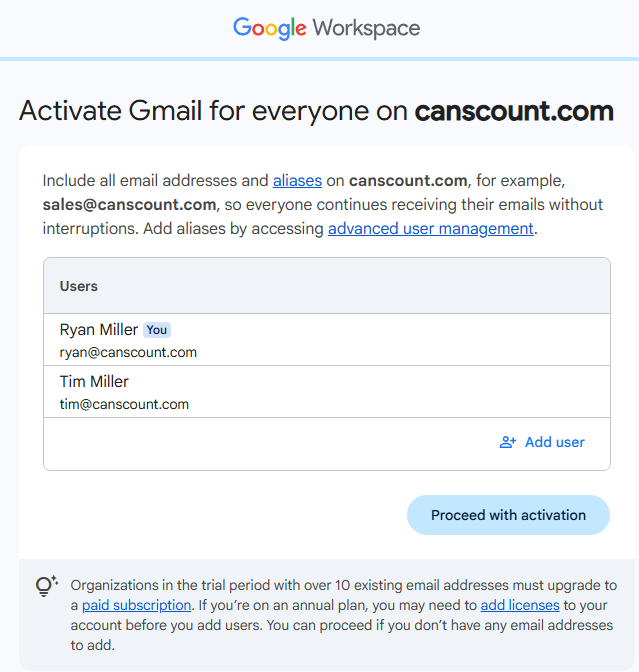
- Ensure all email accounts are listed then click Proceed with activation. If there are any accounts missing either add them on this screen or go to Part 3 "Create User Accounts for each mailbox".
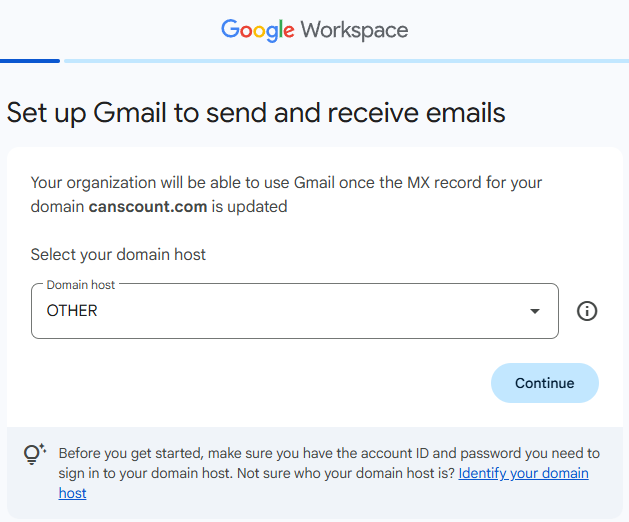
- Select OTHER from the Domain host dropdown. Click Continue.
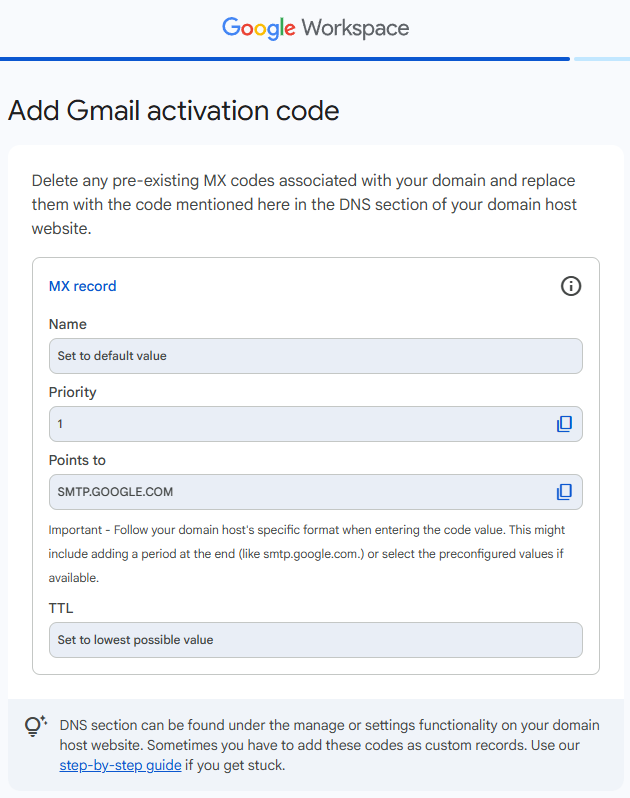
- Google will generate a MX record. Copy the Priority and Points to record value provided (it usually looks like `SMTP.GOOGLE.COM`).
- If ISADEX manages your DNS,
- Log into your websites administrative area. Navigate to Resources >> Support Resquests.
- Click the green New Request button.
- Fill out the form and paste the Value that Google provided in the Support Request Description.
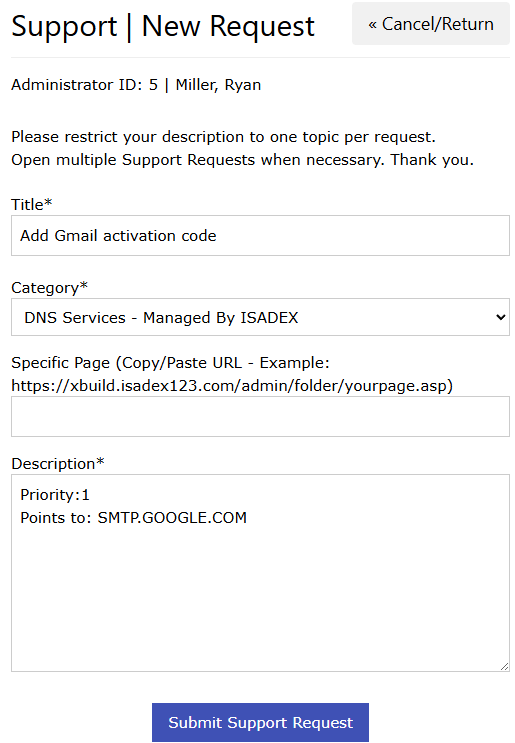
- Submit the Support Request.
- Domains can only be verified after the changes to DNS have been made. ISADEX will email you as soon as those changes have been completed.
- Once you received confirmation from ISADEX that the DNS record has been added skip to step 8.
- Log into your websites administrative area. Navigate to Resources >> Support Resquests.
- If you control your own DNS
- Log in to your domain registrar (e.g., GoDaddy, Namecheap) and add the following records to your DNS settings.
- Log back into your Domain Registrar's DNS Management panel.
- Add the new Google Workspace MX record:
- Delete all existing ISADEX MX records. *Warning: Keeping old MX records can cause delivery errors.*
- Type: `MX`
- Host/Name: `@` (or leave blank)
- Value: `smtp.google.com` (Add a trailing dot `smtp.google.com.` if your registrar requires it)
- Priority: `1`
- TTL: `3600` (or 1 hour)
- Add the new Google Workspace SPF record:
- Delete all existing ISADEX **MX records
- Type: `TXT`
- Host/Name: `@` (or leave blank)
- Value: `v=spf1 include:_spf.google.com ~all`
- TTL: `3600` (or 1 hour)
- Add the new Google Workspace DKIM record:
- Go to your Google Admin Console > Apps > Google Workspace > Gmail > Authenticate email.
- Select your domain and click Generate New Record.
- Copy the Host name (`google._domainkey`) and the long generated TXT value.
- Create a new `TXT` record at your registrar using those values.
- Type: `TXT`
- Host/Name: `google._domainkey`
- Value: `the long generated TXT value`
- TTL: `3600` (or 1 hour)
- Log in to your domain registrar (e.g., GoDaddy, Namecheap) and add the following records to your DNS settings.
- If ISADEX manages your DNS,
- Return to your Google Admin Console.
- Check "Come back here and confirm once you have updated the code on your domain host" at the bottom of the screen theck click Confirm.
- Note: DNS changes can sometimes take anywhere from 10 minutes to 24 hours to propagate across the internet.
- Check "Come back here and confirm once you have updated the code on your domain host" at the bottom of the screen theck click Confirm.
- Add DMIK record. Under Optional setup steps click Authenticate (or go to Menu > Apps > Google Workspace > Gmail > Authenticate Email.).
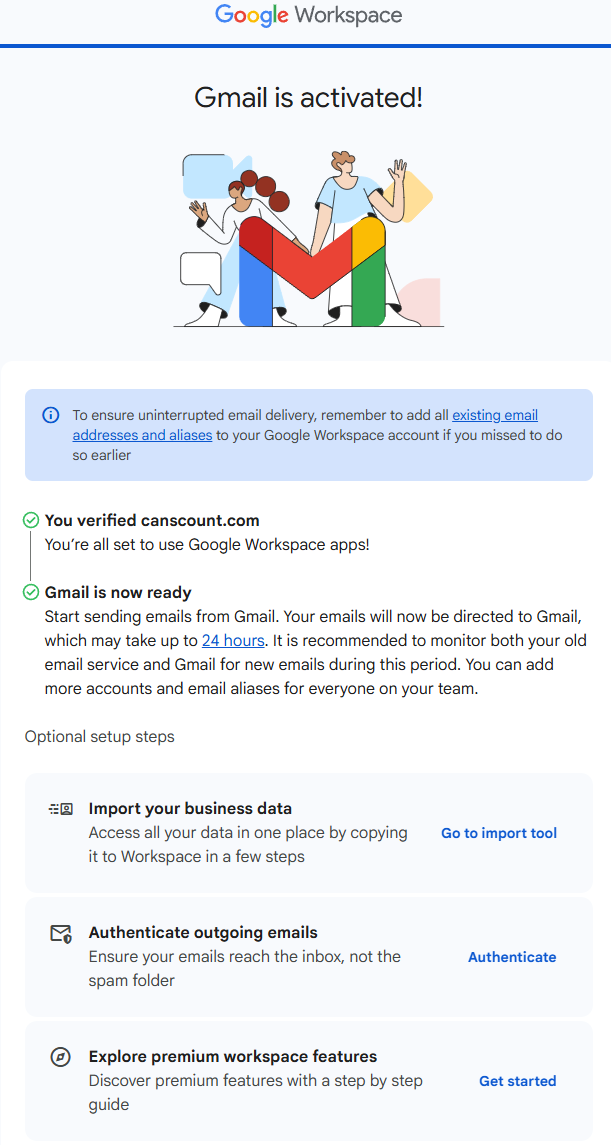
- DKIM record. Select Key bit length 2048. Click Generate Key.
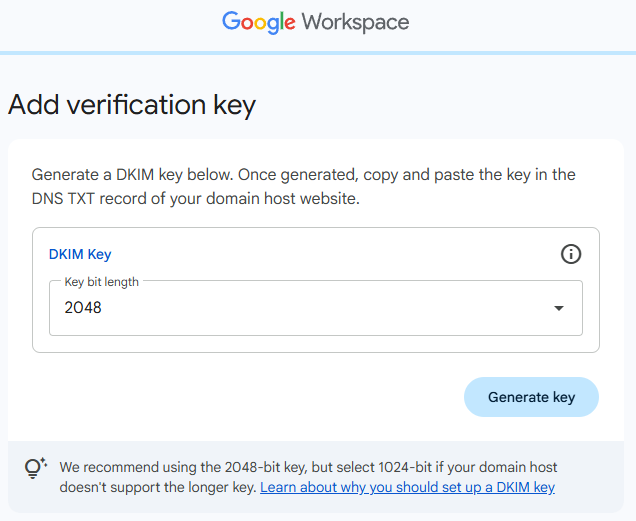
- If ISADEX manages your DNS,
- Log into your websites administrative area. Navigate to Resources >> Support Resquests.
- Click the green New Request button.
- Fill out the form and paste the Name and Value that Google provided in the Support Request Description.
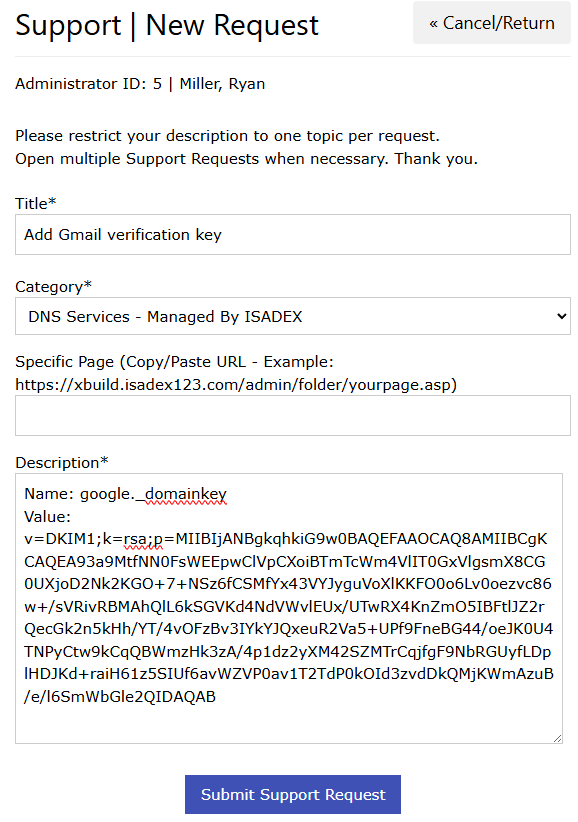
- Submit the Support Request.
- Domains can only be verified after the changes to DNS have been made. ISADEX will email you as soon as those changes have been completed.
- Once you received confirmation from ISADEX that the DNS record has been added skip to step 12.
- Log into your websites administrative area. Navigate to Resources >> Support Resquests.
- Setup Complete